Wall receptacle with high power USB - I used TopGreener TU2154A supplying 4A total, 2.4A max per connector
10ft USB cable
electrical tape
Sugru
electrical multimeter (optional)
I was really tired of the rat's nest of extension cord, wall warts and multiple cables feeding the three 30ft LED strings in our living room. Then a couple of weeks before Christmas it hit me: LEDs consume 5V DC, USB supplies 5V DC, newer wall receptacles with USB can supply enough current. Put them all together and this just might work.
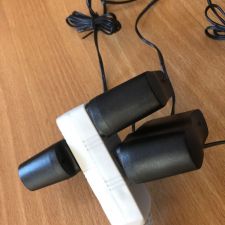
Everyone has those stationary gadgets that come with a wall wart (a really ugly and bulky one), and before long you have a truly atrocious mess all over your home. Turns out you don't need to live with the junk the Chinese suppliers give you. It takes a bit of labor, a modicum of electrical work experience and a few dollars to upgrade those gadgets and your house to a cleaner, visually pleasing solution.
The crucial ingredient here is the recent arrival of wall receptacles that supply more than the wimpy USB3-spec 900 mA. With the receptacle I used here - TopGreener TU2154A supplying 4A total, 2.4A max per connector - I can charge or power pretty much any gadget that requires 5V DC input. The unknown to me was whether the "smart" chip inside the USB charger part of the receptacle would not go above the USB standard for a "dumb" consumer (remember, USB negotiates both, power and data protocol, upon connection). Turns out this is not an issue, my 300 LEDs shine at normal brightness even though their wall warts were rated at 1000 mW each, which leads me to assume that each 100 LED string might pull around 750 mA. Don't take this all as gospel, I am not a USB expert, I just know enough to be dangerous.
Anyway, yesterday I took a deep breath and cut the gadget end off a nice 10ft USB cable. I then proceeded to peel away the aluminum mesh and mylar shield, and separate the wires inside. A word of caution: The neutral conductor in my cable was not insulated, and I promptly lumped it in with the aluminum mesh and mylar, and lopped if off. Left with only three wires (red, green and white) I scratched my head for a while, and then cut back another inch of plastic, mesh and mylar to dig out the fourth, naked wire. The red wire and the naked one looked a little thicker, so I took a guess that those are the power conductors with the other two carrying data. Here my trusty old multimeter was very helpful and established that with the cable plugged into USB I had more than 5V between red and naked, nothing between any of the other combos. Then came the difficult part of stripping the plastic off the red conductor. These wires are so thin that no normal wire stripper will work, so it's back to the kitchen knife routine, carefully carving around the copper strands while not cutting them, until the plastic slides off.
Next, I cut through one of the leads to an LED string, separated the two wires and stripped away the plastic insulation. Now came the moment of truth: With the USB cable plugged in, touch one end of the exposed USB power conductors to one end of the exposed LED conductors, and then do the same with the other two ends, making a manual connection. It is important to remember that LEDs only conduct one way, so if you get the leads wrong nothing will happen. If that's the case, simply reverse the USB end of things. This was the first moment of truth for me. The LED string lit up and established that I can power at least one string with USB. At this point I trimmed back the green and white USB data wires, since they'd only get into the way later.
With that in hand, I cut the other two LED string leads and stripped the wires. I tested each LED string separately, and labeled the conductor that would mate with the "naked" USB conductor with a bit of white electrical tape, so I would not mix up anything later. Then I twisted the three white and the naked wire together and fixed and insulated them with white electrical tape. Repeast with the red USB wire and the unlabeled LED wires, and insulate and fix in place with red electrical tape. I had bought three colors of electrical tape earlier this year, came in real handy now to keep things straight. One last light up test while it is still easy to apply a fix - everything was fine.
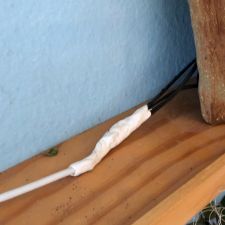
I cut open a pack of white Sugru to encase and permanently fix the new junction. If you have not yet used Sugru you need to get some, it is a truly helpful silicone putty and glue for a great many projects at home. Just check sugru.com for ideas. I kneaded the silicone putty into a sheet and wrapped it around my taped wire junction until I had a decent rubber case around it. I didn't try hard to make this nice and clean, as it will be hidden behind furniture and decoration. You can see in the pictures that it came out quite ugly. Let it cure overnight, and you've got a good quality cable connection that will last.
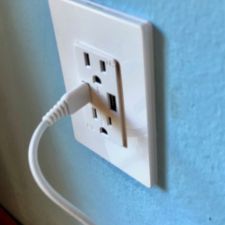
Finally, I exchanged the existing wall outlet with my new USB-enabled one. When doing this, be doubly sure that you shut off the power to the outlet. You can work with live 5V wires without feeling a thing. Doing this with live 120V is deadly. With the new receptacle properly in place, I turned power back on at the distribution panel, checked the new outlet by plugging something into the AC and USB parts, and then connected the LED strings to it for the final configuration.
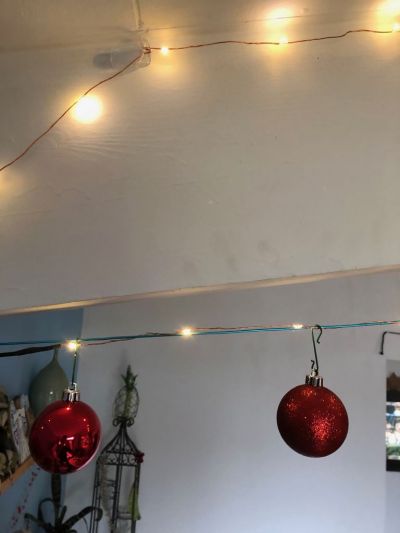
Now I have a sleek, thin cable running up the wall instead of a bulky extension cord, and no more wall warts at all!
|
Trade out this mess. You know you want to! |
The ugly Sugru encasing of the new wire junction. Functional and very durable. If it were exposed I'd have worked much harder, shaping and smoothing it into a nice sleek lump. |
USB powering my LED lights. I also got an AC outlet back in the bargain, and a second USB port to fast charge a phone. |


