First off I have to say that the only reason one should want to restore a Brooks saddle is if the leather is in usable condition. If the leather is too worn to recondition there is no point in keeping the old rails and mounting new leather, just go buy a new saddle from Brooks (they are not that expensive). The only reason I say this is because in my quest to refurbishing my saddle I did lots of research and found many people were trying to restore old seats with new leather, which makes no sense because the worn in leather is the only part that makes the seat worth restoring.
There are four main steps in refurbishing a Brooks saddle:
- Removing the old Leather
In this step I shot a few pictures after I had already started. Make sure to read the captions to the pictures, some of them note important deviances.
- Reconditioning the Leather
I did not have to do this because my leather is in great shape. However, most people trying to refurbish a Brooks will have to spend some time with this step.
- Assembling the Saddle
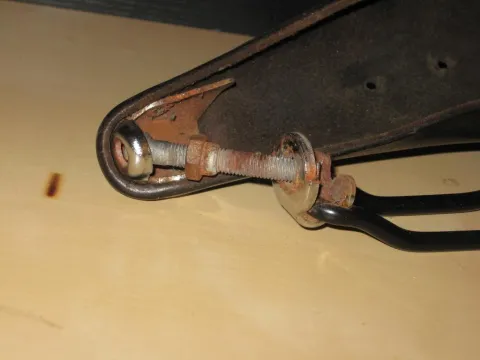
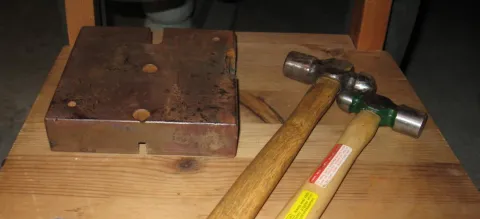
Setting a Rivet
The idea of setting a rivet is to have the right length of shaft (about 1/8th inch) sticking through the two pieces being joined and then hammering the shaft so it flares outwards, thereby clamping the two pieces between the factory made head and the one you are forming with the punch. Rivets come in solid or hollow shaft, difference being strength and ease of installation. Solid rivets like I used are installed with a special type of punch that has a hemispherical depression in the end so it forms a nice round head while flaring. I was impatient and had no immediate access to the correct punch so I used a normal flat tipped punch. The end result is not as beautiful of a head (then again it is the underside of my saddle) and if not done carefully could result in a weak rivet set, so I would recommend using the correct punch. Hollow rivets are installed using a rivet gun, these are much easier rivets to install due to the unique tool.
In this step one of the pictures is for demonstrational purposes only. Make sure to read picture captions for full instructions and notes on deviances.
To set a rivet, lay it head down on the anvil and use the punch in a vertical fashion to flare the excess shaft outwards. Tilt the punch about 10-15 degrees to every hour of the clock (imagine the protruding shaft of the rivet is the face of a clock) and hit the end of the punch once or twice and move to the next hour until you have completed two rotations (these are only guidelines-the actual number of blows and times you complete a rotation depend on how hard you hit and how strong/thick the rivet shaft is). This helps in creating a nice round even head that flares properly to all sides. Keep this method up until the two materials are tightly clamped together. There should be no movement between the two materials.
- Finishing Rivets
This is only done when using rivets with an unfinished head. I do not know of any rivets other than the ones from Brooks that require this step. I did not do extensive research, but I went to a local leather shop and they had no unfinished rivets.
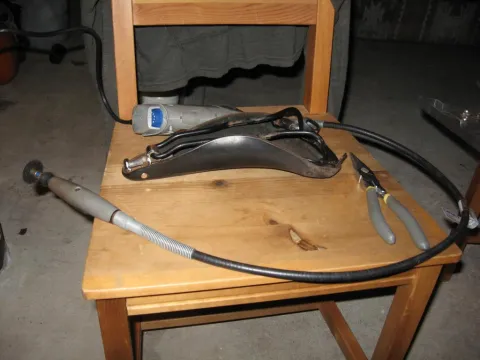
Material
old Brooks saddle with good/save-able leather
replacement rivets
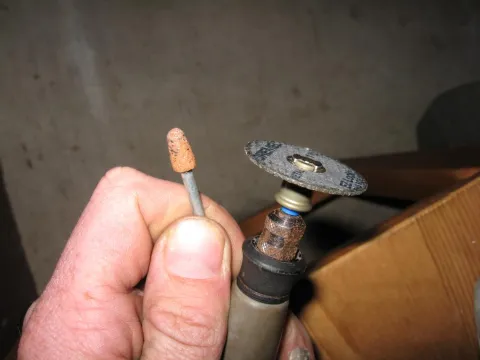
rotary tool with grinding bits
needle nose pliers
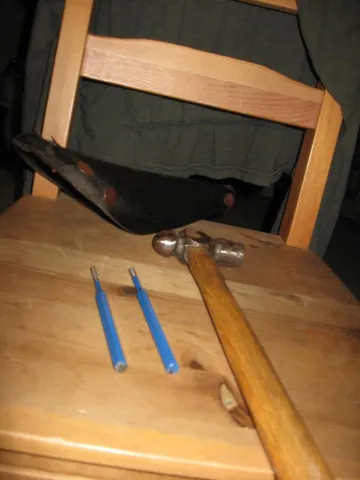
hammer, punch, and anvil (for solid rivets)
rivet gun (for hollow rivets)
ball peen hammer
Instructions
Tools Needed: rotary tool with grinding bits saddle needing refurbishing needle nose pliers.
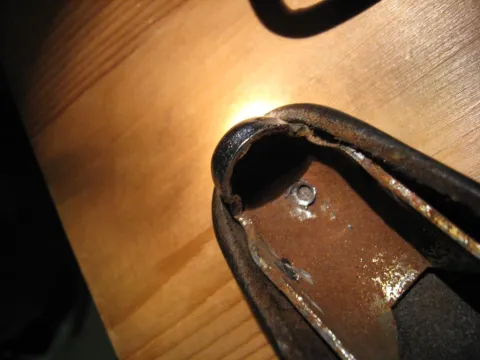
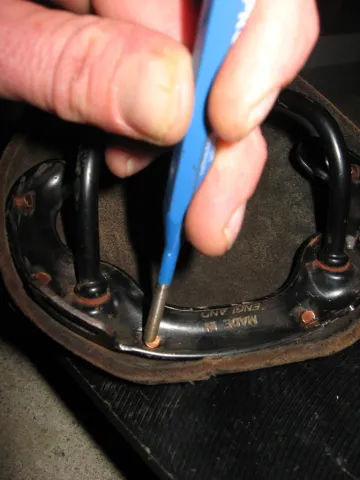
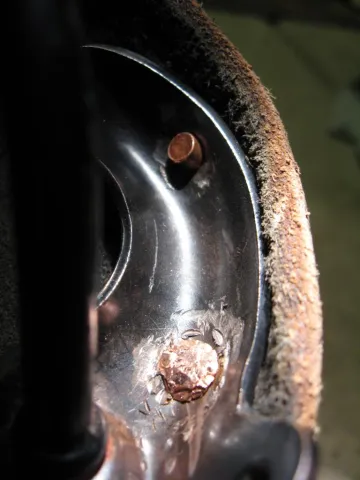
Remove the old rivets by using a rotary tool of some kind with a grinding tip (I found a source who used a drill to drill the old rivets out. The end result was a damaged/enlarged hole in the leather, I would strongly recommend not using a drill). I used two different tips so that I could reach all the rivets while damaging the rails as little as possible.
The point is to grind off the material of the rivet which is flared outwards on the underside of the rail.
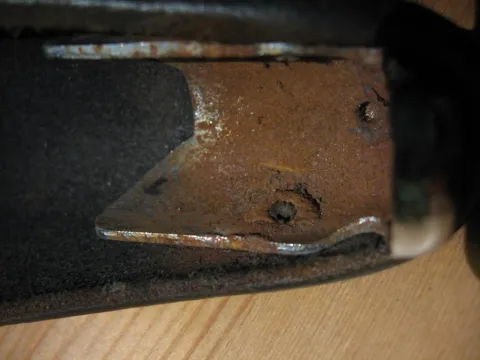
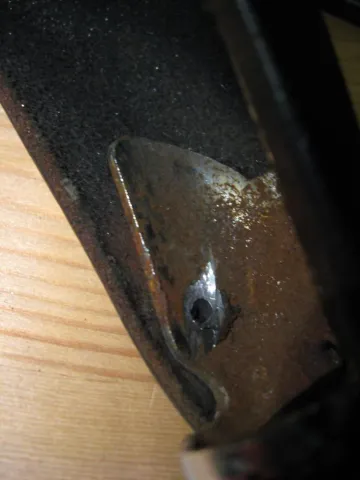
Starting at the back end of the saddle I ground all the flared rivet ends off. (Note: I shot the pictures for this step after I had already finished it, so I am using the pictures of the nose of the saddle, the rear end of the saddle rail has 6 rivets.) When a rivet is ground off it will look like this. Grind all six rivets on the back of the saddle.
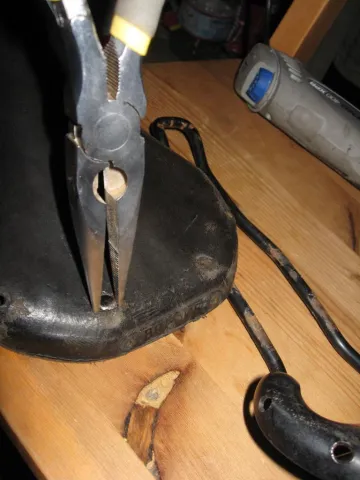
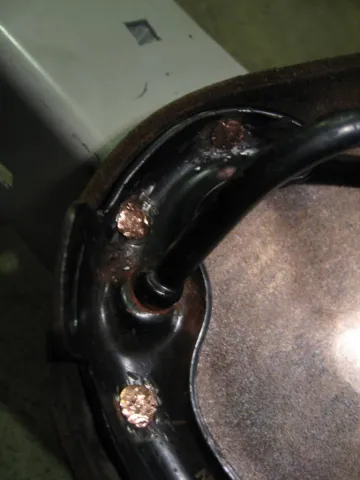
With that done the rear of the leather can be separated from the rail by pulling the two apart, you might have to pull hard, or grind or crush the rivet ends until they fit through the holes in the saddle rails. The nose of the saddle will come undone easily, as the tension adjustment is not securely fixed. Make sure to remember how the three pieces fit together for reassembling later.
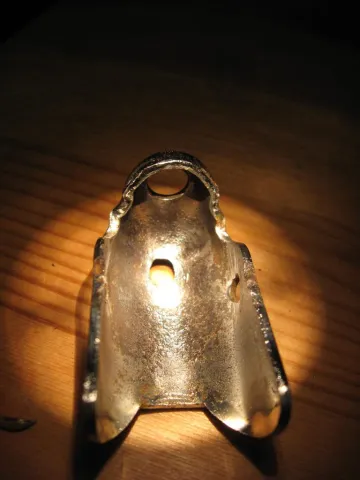
Now you should have the leather attached just to the chrome nose piece by three rivets, follow the same steps to remove those as well, resulting in this.
Use needle nose pliers to pull the ground rivets out of the leather. If needle nose pliers cant grip the head of the rivet, push from the bottom. I would not recommend using a knife or screwdriver to pry between the head of the rivet and leather because it causes damage to the leather (my leather is cosmetically not pristine, I am not striving for looks, only comfort, but I want to keep it as strong as possible for long-term use).
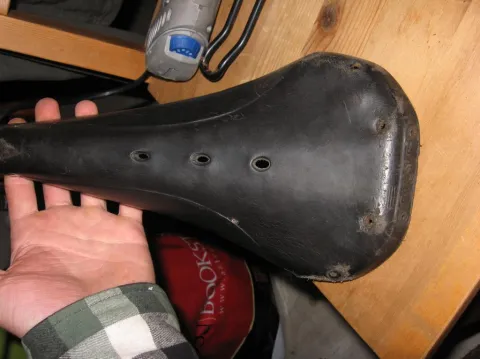
The end result should be the leather (still in saddle shape) with no rivets or rails.
If leather conditioning is needed, this is the time to do it. My saddle did not need any work here because it is broken in nicely and I am merely replacing broken rivets. I did however notice that the front three rivet holes in the leather are elongated instead of being round. This is slightly worry-some since further elongation is bound to happen and at some point the rivet will pull through.
I ended up with this, which I am fine with. If you want to be really thorough, sandblast the whole rail assembly and repaint with black.
Tools Needed To Set Rivets hammer, punch, anvil (for solid rivets) rivet gun (for hollow rivets) saddle rivets of your choice (my rivets are pushed through the leather already for mock up)
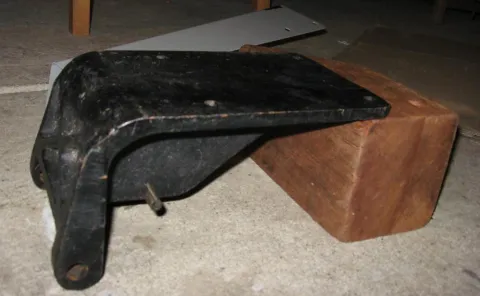
This is the homemade anvil that I used. It is a large chunck of cast iron that I placed onto the concrete foundation at my house. I recommend a real anvil, but I am poor and have access to scrap metal.
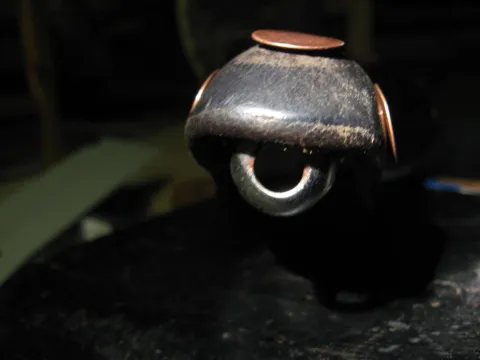
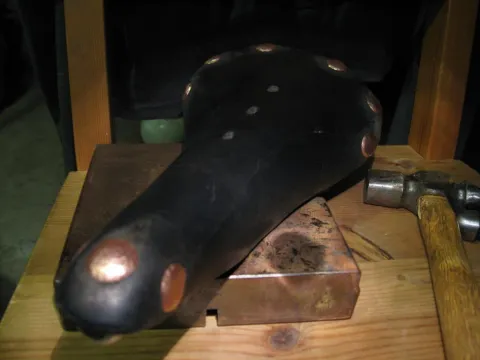
I already set the front three rivets, so I am mocking up this step on the rear of the saddle rail. On the far left you can see the rivet protruding from the rail, its a little more than an 1/8th inch. Read above under step 3 Setting a rivet on how to set a rivet properly.
First assemble the chrome nose piece and the leather with all three new rivets sticking through, holding the two materials together for ease of setting. Set these three rivets first so you can assemble the tension adjustment correctly before setting the back six rivets. This is the result.
Because I used the largest copper rivets Brooks sells I had a gap between the leather and the edge of the rivet. This is normal because of how the rivet is formed, however if the gap is too big, the rivet might not be set tight enough or the rivet head on the top of the saddle might become a large bump after finishing that will be a nuisance while riding. When using rivets that already have a finished head, there should be no gap.
After attaching the chrome nose piece, assemble the tension adjustment (refer to picture in step 5) and mount the leather on the rails, pushing all six rivets through on the back end, this will help keep the leather in place while setting the first few rivets. Set the rivets in the same fashion as before starting with the two in the middle and working to the sides.
After attaching the chrome nose piece, assemble the tension adjustment (refer to picture in step 5) and mount the leather on the rails, pushing all six rivets through on the back end, this will help keep the leather in place while setting the first few rivets. Set the rivets in the same fashion as before starting with the two in the middle and working to the sides.
Unless you have unfinished rivets (like the medium and large copper rivets from Brooks) the seat is done, ready to adjust the tension, mount to your bike, and go for a ride. I still need to finish and form the heads on mine.
Tools Needed for Finishing Rivets ball peen hammer saddle with unfinished rivets anvil punch (to use as an anvil for hard to reach rivet ends)
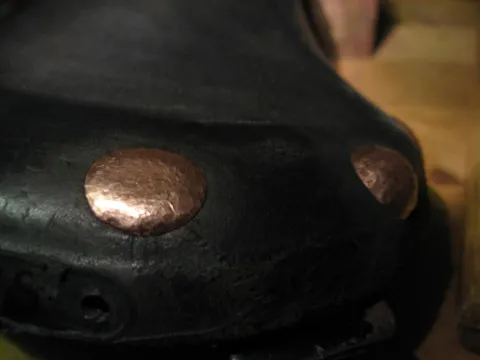
n order to finish a rivet, set the bottom head (underside of the saddle) onto an anvil and use the rounded end of the ball peen hammer to form the head of the rivet to fit the contour of the saddle. This is done by hitting the rivet head dozens and dozens of times, every time striking in a different spot. Start hitting the rivet from the center moving towards the outside. The impact hardens and burnishes the copper while forming it.
This is where the punch comes in: the rivet might not actually have a solid backing, which makes forming the rivet head hard and deforming the seat rails easy. It might be easier to set the saddle on top of the punch standing upright on the actual anvil in order to create a nice solid backing that will reach into the tight curve of the seat rail. I did not do this, so I ended up bending the pouch loops on the back of the Brooks B17.
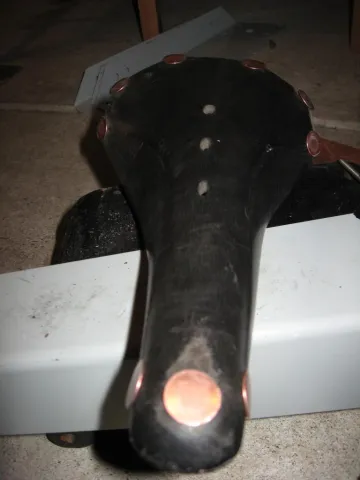
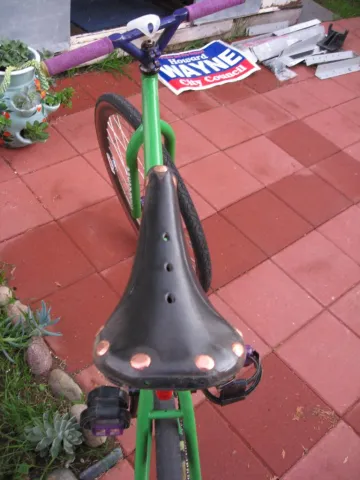
The end result - a restored Brooks saddle - should be as shown, a seat with nine multifaceted rivets shaped to the contour of the seat. The forming also ends up being a finishing quality and after some riding they will take on a nice antique quality.